Friday, September 15, 2017

PAINTING A BEAUTIFUL CHANDELIER CEILING MEDALLION TO MATCH WALL COLOR

My clients were building a home.  They purchased this beautiful large ceiling medallion for the dining room chandelier and said maybe I could paint it to match the cabinets nearby.  I said, "I'll be glad to do that but let me show you how it will look if I paint it with the wall color.  If you don't like it I will paint it to match the cabinets."
They LOVED it!
It was already white.  I used the wall color.  I painted on and used a rag to wipe off some areas.  Then, I painted the swirly scrollie areas more solid to contrast and set off the lighter wiped areas.  Because the paint was an eggshell sheen, it did not need to be sealed.
My clients were very happy with the way it turned out.
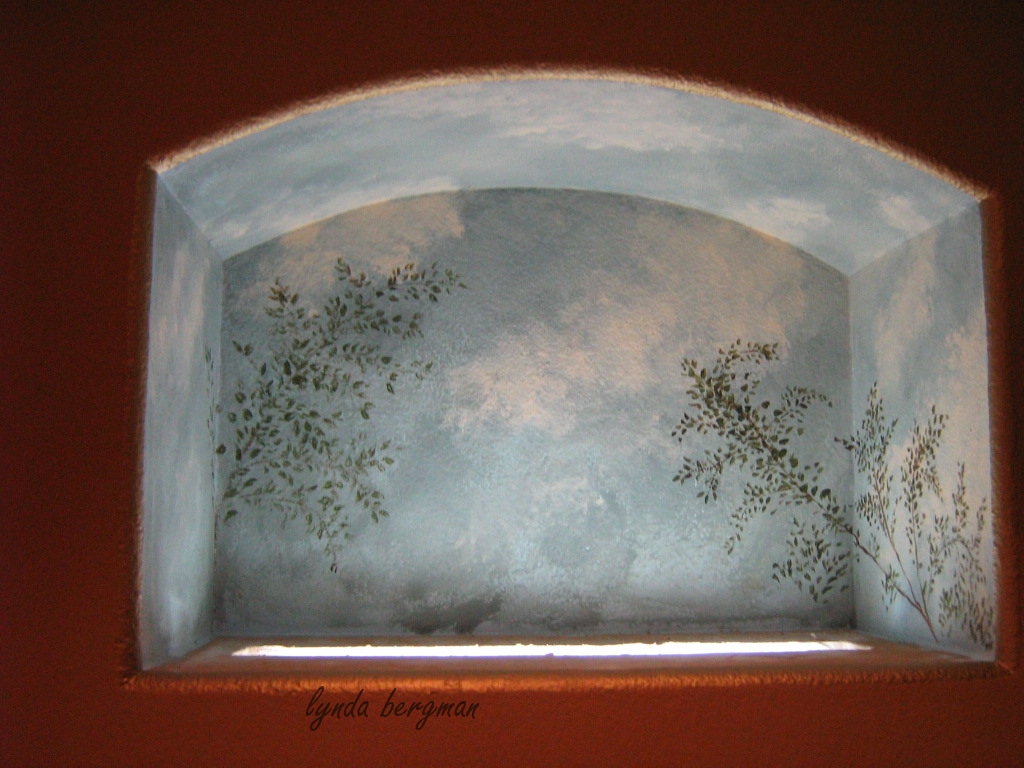
This house is out in the country and the gray and green colors they used looked so nice with the beautiful nature scenes you could see from their very large windows.
~
PAINTING & INSTALLING A CEILING MEDALLION 
~
TUTORIAL
     This ceiling medallion was white. 
 I painted the dark brown, then the gold and silver.  
     If you want to paint a ceiling medallion you don't have to do all the detail.  Paint a base coat and  sponge metallic paints or any colors you want all over.  You can leave it white or you can paint it a solid color like your ceiling or wall color. 
 Then, seal it with a dull or satin clear coat.  
     It's most convenient to install a ceiling medallion when you are changing out your light fixture or fan.  If you have an electrician he will have to take your fixture down, attach the ceiling medallion to the ceiling and reattach the fixture.
     If you want to do it the easy way...there are medallions that are a little smaller and are in two pieces.  Once you paint the two pieces you attach them to the ceiling around the base of your light fixture or fan.  Sometimes, to get it to fit properly, you have to unscrew the fixture canopy at the ceiling.  That is the part of the fixture on the ceiling that hides the wiring.  All you have to do is loosen the canopy with a screw driver, lower it, attach the ceiling medallion and then re-screw the canopy at the ceiling.  One thing that might be important is to measure how wide your canopy is.  Some are three inches and some are four inches, etc.  You need to make sure it will fit in that middle part of your ceiling medallion.
~
Base coat tan, painted metallic gold & aged with black paint.
Tan base, painted metallic silver, gold & copper.
Painted moss green base, metallic silver, gold & burgundy.
The green base looks like a patina.
Painted tan base, metallic copper trimmed with metallic gold.
Aged with brown paint.
Green base coat, metallic gold, silver & burgundy.
Painted moss green base coat.  Used two shades of metallic gold.
Then lightly rubbed metallic gold all over.
Dark brown base coat.  Metallic gold & silver.
Aged with same dark brown.
Turquoise, pink, purple, yellow & green.
Metallic gold & silver.  Antiquing glaze to age.
Dark brown base, crackle medium  Painted purple grapes
green leaves & dark brown vines.
Tan base coat.  Metallic gold & metallic burgundy.

Tuesday, September 5, 2017

DRAWING & PAINTING TROMPE L'OEIL WINDOW & SKY ARTWORK ABOVE PATIO DOORS

DRAW & PAINT WINDOWS ~ SKIES ~ SHUTTERS

Years ago, before I finally started using a digital camera I took lots of pictures of my work and had the "film developed".  I bet there are some people who don't know what that means.  Looking through those pictures I'm finding work I want to share with you.
In her living room, my client had very high walls and a big empty space above her doors that went out to her patio.  She asked me to come by and suggest something to go on that wall.  She asked what I thought about some design with scrolling.  But, seeing the outside I immediately saw a window with a sky and trees. 
 I suggested that to her and she loved the idea.
It was very easy to draw and paint.  I think you could do it, too.
~
TUTORIAL
First I drew the frame that would frame the sky.  I made it 4" or 5" wide.  You can decide how wide you want your frame to be and paint it any color you want.  I painted it the same white as her doors and woodwork/trim.  Use craft paints raw umber or some darker browny gray for shadowing around the edges.  In your color tray water down the paint just a little bit so it will flow more easily as you paint.  Painting that thin shadow will make it look more 3 dimensional.  For shadow reference, look around the room at the shadows on other trim.  Next, with my brush I smudged and swiped blue and white (like faux painting) and made it look like a sky with clouds.  Draw you some birds.  You can make copies or draw them on paper and trace the birds on the wall, then paint them.  Decoupage would be ok, too, for the birds.  For the trees I like to draw the branches first with a pencil.  I draw lines where I want them to be.  Paint over them with raw umber or whatever shade of brown or gray brown that you want.  Then, draw leaves or use a small paint brush and dot, dot, dot with green.  You can also draw any size or shape of leaves you want.  At first you might not be happy with your artwork, but wait a while and let your family and friends see it.  After a while I bet you will be very happy with yourself.  
Have fun!!
~

PAINTING SKY & CLOUDS ARTWORK IN A NICHE ABOVE THE LINEN CABINET

While I was doing other work at Carolina's home she asked me to look at her guest bath.  She wanted me to paint the cabinets black and metallic gold.  There was an open space above her linen cabinet and she asked if I could paint a sky inside of it.  
She added a bird nest.  
That completed the scene and looked just beautiful to me.
There is a light at the bottom, shining up at the sky.
Here you can see it from the guest bedroom.
Before she added the bird nest.
~
TUTORIAL
In a small space like this you can paint the blue first and add swirly white or you can paint the white first and paint some swirly blue.  Then, work on the area to get your clouds and sky just the way you want them.  I used brushes, but you can use a rag or a sponge.  If you want to add some branches, use a small brush.  Use the paint colors of green for leaves and brown for branches.  Draw your branches then draw tiny leaves or the size you want them to be for your sky.
I used craft paints.
HERE IS A LINK TO 
~

SHUTTERS

PAINTING METALLIC GOLD/LEOPARD SPOTS SHUTTERS FOR A WINDOW
(LINK TO)
& TUTORIAL
~

Thursday, August 24, 2017

HOW TO BUILD A SHUTTER CABINET FOR A SMALL SPACE

HOW TO BUILD A SHUTTER CABINET FOR A SMALL SPACE

When I found this shutter it was painted white and a little bit of wood was showing through.  I wanted it to look more distressed, so I left it outside for three or four months.  After being rained on several times, I decided I finally liked it, just fine!  So, I distressed it a little bit more and added white and gray paint.  Then, I added the subtle stencil on top, middle and bottom in a soft metallic silver.  
Actually, I was just curious how it would hold up after being rained on.  
Maybe you shouldn't do that :)
It's easy enough to get a distressed look with paint.
From the rain hitting it, there is a bit of decayed wood on the very top,
 but I really like the way it looks with the distressing.
As I was sealing the shutter, I put lots and lots of sealer on the decayed wood.  I didn't want it to crumble.  The rest of the shutter is not rotted.  Just the top.
My home is small and I'm always trying to figure out ways to add more storage.  This shutter cabinet is perfect just outside of my bathroom.  Those two legs that I added to the bottom hold it up, but I also added two L hooks/angle hooks on the top.  Otherwise, it would topple over.
After working on the shutter, I built a frame the size of the shutter out of 1 x 6 boards and cut and installed 7 shelves. 8 including the bottom of the frame.  I used the wall as the back.  That way, it kept the cabinet narrow, since I didn't have a lot of room in the hallway.  At Lowes, I found some perfect legs to attach to the bottom.  I painted the frame and legs a steel blue and then painted and rubbed off metallic silver.  The color looks so nice with the distressed and faded white and gray shutter.  It needed a knob, so I found a wooden one and painted it to match the shutter.  At the very end, I sealed everything with a "dull" clear coat.

     Finally, I added the hinges and attached the door .
This cabinet is sooo easy to make and is the perfect size for a narrow space.

I really love how it turned out.  And, I did it myself!!

MY FAVORITE WIRE CUTTERS ~ SO EASY TO USE!

MY FAVORITE WIRE CUTTERS ~ SO EASY TO USE

I went shopping for new wire cutters.
The sales guy showed me these KOBALT cutters.  He said he took these home to his wife and she said they were really easy to use.
So, I purchased them for around 12.00.
They are WONDERFUL!!
I used to struggle, cutting thicker wire and tin or metal things with my really old cutters.  It always hurt my hand.  Using these wire cutters is almost like using scissors.  If you're struggling with your's, check these out.  I bet you can find them at any hardware store.  There is a Lowe's very close to my home, so that's usually my go-to store.
~

Monday, August 21, 2017

PAINTING PATTERNS HARLEQUIN~STRIPES~CHECKS

PAINTING HARLEQUIN PATTERN
Painting a harlequin pattern on your wall (or anywhere) will look so smart.  You can draw and paint your pattern any size or any color you want.  Just measure, measure, measure.
There is LOTS of drawing.
I always use a pencil so I can erase any lines I'm not going to use.
HARLEQUIN TUTORIAL

If you want to paint a harlequin pattern on your wall, you first decide your colors.  You can paint a base coat color on  your wall or work with the existing color.  After that dries really well you can start drawing.  You need a pencil, an eraser and a level.  (I love my level!)  Decide how large you want the diamond shape to be.  This client wanted a smaller pattern.  I like the look of a larger pattern than this one.  On an 8' wall maybe stack four harlequins.  If you had no baseboard, each one would be about 24".  But, you have a baseboard and, possibly, a crown molding.  You have to figure and subtract a few inches so they'll fit in your space.  Next you decide how wide you want each pattern to be.  Now you start figuring and drawing.  This is why I use a pencil.  I draw a grid on the wall and erase any lines I don't paint over.  Choose a contrasting color.  Pay close attention to your painting, making sure you skip every other diamond.  I always put a piece of tape on the diamond I WON'T be painting.  You can cut out different size paper patterns and tape them on the wall.  That will give you a better idea about the size you might want.
As I painted each diamond, I wiped the paint with a rag.
(LINK TO)
DRAWING & PAINTING HARLEQUIN PATTERN & STRIPES
TUTORIAL FOR WET BAR HARLEQUIN

The walls in this wet bar were painted white.
I drew my harlequin pattern with a pencil.  When you paint it should cover the pencil marks.
Because it's easy to get confused I always count out and put a piece of tape on every other diamond.  That way I won't start painting the wrong one and, believe me, I have done that. 
As I painted the gold, while it was still wet, I used a rag to rub a lot off.  Especially in the middle.  Then, in the white diamonds I very lightly brushed the metallic gold around the edges so it would look shadowy.  Kind of hard to see in this picture.
At each point where the diamond points met I painted the red circle with my finger.
If you don't want to use your finger you could cut a sponge into a circle and use that instead.
Black and white.  Red fleur d'lis.
Glazed with tea stain antiquing glaze.
Were beige walls.  Used tea stain for glazing.
Make antiquing glaze with raw umber & black added to clear glaze.
Measure slowly.  Stir well.

~

PAINTING STRIPES
STRIPES TUTORIAL

First, I painted the base coat.  The client told me about how wide they wanted the stripes.  I measured around the room and decided how wide they could be.  But, it's important to count the stripes and make sure that when you get to the end, you don't have two of the same color.  Even though I know how to count, I still use my yard stick and go around the room, saying to myself: "pink/orange, pink/orange".  A long time ago when I was painting stripes I had everything measured just perfectly and at the end, I had two of the same color!!!!!  Not sure how that happened, but, that's why I count around the room just making sure there are NO mistakes!  As you're painting, if you see you're going to have a few inches left over or a few inches short, it's ok to start adding or taking away 1/4" or 1/2" to each stripe.  As you're wrapping around a corner, you can cheat a little bit, too.  
It will all come out looking really nice.  
Have fun!! 
(LINK TO)
(LINK TO)
 
(LINK TO)
(LINK TO)
 DISTRESSED AMERICAN FLAG I PAINTED
 Lynda Bergman Decorative Artisan    PAINTING, PAINTING A STRIPE & DISTRESSING FURNITURE FOR PATTI'S BEACH HOUSE
ONE STRIPE IS COOL
(LINK TO)
Parents to-be asked me to paint these stripes in their nursery.
The dad measured and marked where he wanted me to paint the stripes.
Then!  I had to make them match at the fourth corner.
Plan ahead to end your stripes behind the door.
 
(LINK TO)
(LINK TO)
(LINK TO)
~
PAINT A CHECKERED PATTERN
(LINK TO)
I painted and distressed this chest using oil based paint.  
As I painted, I wiped some of the paint off with a rag.
I painted the checkered top with white water based paint.  I made my own stencil and stenciled and painted the black checks.  After stenciling, I did use a tiny brush to define the edges and corners.  It was still a bit uneven, but that is the way I wanted it to be.  I wanted it to look hand painted.  On the feet I didn't use a stencil.  I chose a small flat brush the size I wanted the checks to be and painted from sight.  No perfection here!

Saturday, August 19, 2017

PAINTING A FARMHOUSE~BARNWOOD FAUX FINISH ON A TABLE

PAINTING A FARMHOUSE-BARNWOOD FAUX FINISH ON A TABLE

Patti has been my client for many years.
  I'm so glad she calls me when she's working on a new project.  I really love her style and really enjoy working with her.  Recently, she called and  wanted me to paint a faux farmhouse~barnwood finish on a dining table for her daughter's new home. 
This is a picture of the table "after" I painted it.
I always use brown and gray colors to get this look.
It's not hard to paint a "farmhouse" or "barnwood" faux finish.
 The table and legs were a white washed light oak finish.  For the base of the table I used a white oil based satin paint.  I painted small sections at a time and immediately rubbed the paint off of the areas where I wanted to expose the old finish.  I used soft rags for wiping the paint.  I didn't seal the oil paint.  I left the shiny satin finish, hoping to contrast with the duller farmhouse~ barnwood table top.
To start, I painted a wood colored paint as my base coat.  Next, I brushed on a medium gray color.  With a rag, I gently rubbed off the gray in linear strokes.  Always brush the direction of the wood grain.  In this picture it is painted and you can't see the wood grain, but you can imagine how the wood grain would go.  The brush strokes should be almost dry brushed because you want to see the base coat of tan through the gray.  Try to make long strokes, but it's ok to have shorter strokes, too.  That's the way natural wood looks.  On top of the gray, I painted a dark brown.  I painted the brown in long and short strokes.  As I was brushing it out, I left some of the strokes a little heavier with paint and some a little more brushed out.  I did this so the brush strokes would simulate wood grain.  
This is the "before" white washed finish on the table.
Patti actually fed her children on this table when they were small. 
So sweet that her daughter has it now.
She will be feeding her children at this same table, too.
Many times clients have asked me to paint furniture they've kept in storage for years.  Painting and making it new again is perfect for the kids that slept on it, played on it, shared a meal with family, etc.  Many times older furniture has really good lines and painting makes it beautiful and new again.